

Surgical Loupes · Ergonomics and health
Surgical loupes for implantology: magnification and ergonomics guide
Technical guide for choosing surgical loupes for implantology: magnification, field of view, depth of field, working distance and headlight illumination.
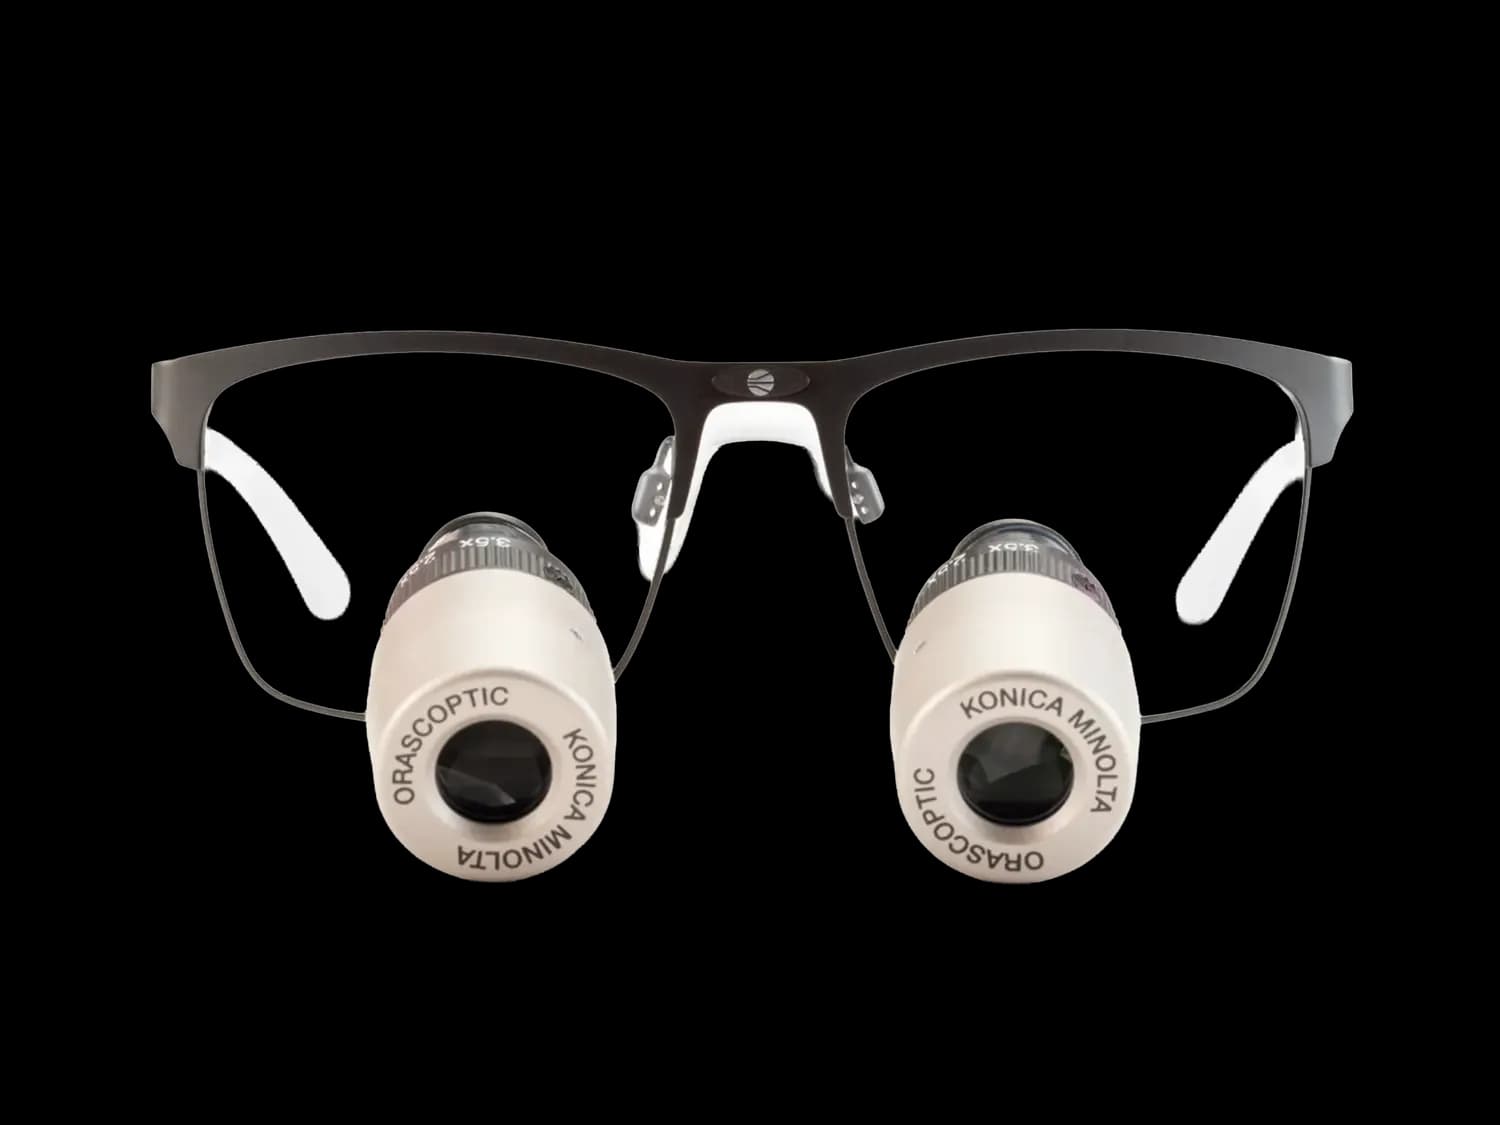
Surgical loupes for implantology must balance magnification, field of view, depth of field and ergonomics. The choice depends not only on seeing more detail, but also on maintaining a stable image, a sustainable clinical posture and a working distance consistent with each procedure.
How to choose surgical loupes for implantology
In implantology, intraoperative planning, access, bed preparation, soft tissue control, suturing and review of fine details are alternated. Each phase requires a different relationship between visual precision, spatial orientation and postural comfort.
That is why suitable surgical loupes are not assessed solely by the number of magnifications. The width of the field, depth of field, perceived weight, frame, optical declination and compatibility with headlight illumination also matter.
The technical goal is for the professional to work with detail without getting excessively close to the surgical field. When magnification forces the neck to flex, the shoulders to rise or the position to be changed continuously, the visual advantage may be limited by postural load.
Before requesting a demo, it is advisable to define three variables: which procedures are performed most frequently, what working distance feels natural and what level of magnification allows sufficient anatomical references to be maintained.
Magnification: fine detail without losing orientation
In implantology, magnification should make it possible to observe small structures, margins, peri-implant tissues and suture details, without closing the visual field too much. Higher magnification can facilitate reading fine details; however, it also usually reduces the field and demands a more stable visual technique.
For procedures where it is necessary to alternate between an overview and precision, it is often useful to assess intermediate magnifications or configurations that do not excessively limit depth of field. By contrast, for very specific fine-detail phases, it may make sense to consider higher magnifications if the professional already works with good postural stability.
The practical question is not “how much magnification is possible”, but what magnification allows you to work with control throughout the procedure. During an intervention, vision should accompany the clinical gesture, not force constant readjustments.
Signs that magnification may be excessive
Magnification that is too high for the user's workflow may lead to several situations:
- Needing to reposition the head frequently to regain focus.
- Losing peripheral references of the surgical field.
- Difficulty working at different depths without interrupting the gesture.
- A tendency to move closer to the patient to compensate for visual perception.
- Greater dependence on cervical movements instead of controlled hand and instrument movements.
These signs do not mean that high magnification is inappropriate in all cases. They indicate that the complete configuration should be reviewed: working distance, declination angle, optical type, illumination and postural habits.
Field of view and depth of field in implantology
The field of view defines how much of the working area is visible through the loupes. Depth of field indicates the range within which the image remains sharp without needing to change posture. In implantology, both factors are critical because the procedure does not always occur on a single plane.
A wide field helps maintain anatomical orientation and instrument control. Sufficient depth of field makes it possible to move from a more superficial area to a deeper one with less need for readjustment. When both parameters are adequate, work is smoother and visual interruptions are reduced.
However, field and depth should not be interpreted in isolation. They are related to magnification, working distance and optical design. At higher magnification, it usually becomes more important to check whether the available field is still comfortable for the specialty and the professional's technique.
| Criterion | What to assess | Risk if not properly adjusted |
|---|---|---|
| Magnification | Level of detail required in routine phases | Field too narrow or postural dependence |
| Field of view | Ability to maintain references of the surgical area | Loss of orientation and more head movements |
| Depth of field | Sharpness when working on different planes | Frequent refocusing or posture changes |
| Working distance | Natural separation between eyes and clinical field | Cervical flexion or excessive leaning in |
| Optical declination | Visual line compatible with neutral posture | Cervical overload or shoulder elevation |
The real test should simulate the usual clinical posture. If a configuration seems comfortable while standing but is used seated, or if it is tested on a table without reproducing the patient's position, the assessment may be incomplete.
Working distance and clinical posture
Working distance is the separation between the professional's eyes and the surgical field when a comfortable posture is maintained. In surgical loupes for implantology, this distance should be measured from the real working position, not from a posture artificially corrected for a few seconds.
A properly adjusted working distance allows the image to be formed where the professional operates naturally. If the distance is too short, it may encourage cervical flexion. If it is too long, it may force the arms to stretch or alter the relationship with the patient.
Ergonomics also depends on the declination angle. This angle determines where the professional looks through the optics. If it is well adapted, it makes it easier to look at the field without excessively tilting the head. If not, cervical tension or compensatory postural changes may appear.
At this point, the frame also matters. It should offer stability, a good facial fit and compatibility with prolonged use. Within the range of Optimedic Loupes solutions, loupes, frames and lighting can be assessed as a system, not as independent elements.
TTL or variable magnification alternatives
TTL (through-the-lens) loupes integrate the optics into the frame lens. This configuration usually aims for stability, personalised alignment and a compact set-up. For implantology, it may be suitable when the professional has a defined working distance and needs a solution adapted to their usual posture.
The TTL configuration requires precise measurements: interpupillary distance, working distance, mounting height, declination angle and visual needs. When these parameters are adjusted correctly, the loupe becomes part of the clinical routine with fewer moving elements.
Variable magnification alternatives may make sense when the dynamics of the procedure change frequently or when the professional needs to alternate levels of detail. In those cases, the criterion is not only optical power, but also the ease of moving from a more general view to a more detailed one without breaking workflow.
To explore this decision further, you can consult the guide on TTL surgical loupes by specialty, which explains selection criteria according to clinical use and configuration.
When to prioritise TTL
A TTL configuration often fits when:
- The working posture is well defined.
- A personalised and stable optical alignment is sought.
- The professional works repeatedly at a similar distance.
- The aim is to reduce the manipulation of moving elements during the procedure.
- The priority is to integrate the loupe into a consistent clinical routine.
When to review variable magnification
It may be reasonable to consider a variable magnification alternative when:
- Exploration, access and fine-detail phases are alternated.
- The need for magnification changes within the same procedure.
- A general overview should be preserved in certain phases.
- The professional wants to compare different levels before fixing a configuration.
The decision should be made with guided testing, especially if the user is moving from lower magnification loupes or from working without magnification.
Headlight illumination in deep or limited-access areas
Magnification improves the perception of detail, but it needs adequate illumination. In implantology, deep areas, limited access and shadows created by hands or instruments can make visual reading of the field difficult. For this reason, combining loupes with headlight illumination can provide coaxial lighting more aligned with the line of sight.
A headlight for loupes helps direct light towards the observed area without relying solely on the dental chair or operating room lamp. This can be especially useful when the field is within a cavity, when angulation changes or when the professional's head casts a shadow.
The headlight selection should consider weight, battery life, adjustable intensity, perceived colour temperature and ease of disinfection according to the centre's protocol. It is also advisable to check how the set balances with the frame, because poorly compensated illumination can cause frontal discomfort or nasal pressure.
The aim is not to add light without criteria, but to achieve stable illumination compatible with posture. During the demo, it is advisable to test the loupe and the headlight as a set, in the real working position and with movements similar to those of the procedure.
Steps to request a customised configuration
A customised configuration should start from concrete clinical and ergonomic information. The clearer the description of the use, the more useful the technical recommendation will be.
1. Define priority procedures
The first step is to identify which implantology procedures are performed most frequently and in which phases more detail is needed. Prioritising implant surgery, soft tissue management, fine suturing or review of hard-to-access areas is not the same.
It is also worth indicating whether the loupes will be used exclusively in implantology or whether they will be shared with other clinical areas. This information helps assess whether a more specific configuration or a more versatile solution is preferable.
2. Measure the real working distance
The distance should be measured in the usual position, with the professional seated or standing as appropriate, and with a posture that can be maintained throughout the procedure. An approximate measurement taken outside the clinical environment is not enough.
If there are cervical or lumbar discomforts, or a tendency to lean towards the field, these should be mentioned during the assessment. Not to make clinical claims about the product, but to better adjust the relationship between vision, posture and distance.
3. Review magnification, field and depth
Magnification should be tested together with field of view and depth of field. A configuration may offer a lot of detail in a static test and still be demanding during a dynamic intervention.
The test should include hand movements, changes in plane and observation of peripheral references. This makes it possible to detect whether the field is sufficient and whether the image remains stable without constantly changing head position.
4. Assess TTL, variable magnification and illumination
With the above information, the professional can compare TTL, variable magnification alternatives and headlight illumination. The choice should respond to the way of working, not to a generic preference for a particular type of loupe.
At this stage it is useful to review a customised surgical loupe configuration to understand which parameters are adjusted and why they influence the clinical experience.
5. Prepare the demo or technical consultation
Before a demo, it is advisable to have a short list ready:
- Main procedures and approximate usual duration, without needing to provide patient data.
- Most frequent working position: seated, standing or alternating.
- Estimated working distance and current posture.
- Previous level of magnification used, if any.
- Need for headlight illumination in deep areas or with shadows.
- Frame, weight and fit preferences.
With this information, technical advice can focus on viable configurations from the first contact. To move forward, you can request information about surgical loupes and prepare an assessment adapted to clinical use.
Common mistakes when choosing loupes for implantology
One of the most common mistakes is choosing the highest magnification without checking the field of view. In implantology, precision is important, but so is maintaining anatomical references and controlling the instruments within a sufficient area.
Another mistake is testing the loupes in a posture that does not resemble the real working position. A configuration may seem correct for a few minutes and not be suitable when the usual distance, tilt and length of use are reproduced.
It is also advisable to avoid decisions based only on weight or only on frame aesthetics. Both factors matter, but they should be assessed together with stability, facial fit, optical angle and illumination.
Finally, the choice of loupes and headlight should not be separated if work is frequently done in deep areas. Illumination is part of the visual performance of the set and can alter the feeling of comfort during use.
Frequently asked questions
What magnification is usually recommended for surgical loupes in implantology?
There is no single magnification for all professionals. In implantology, it is advisable to balance fine detail, field of view and depth of field. The recommendation should be based on the usual procedures, working distance, previous experience with magnification and the ability to maintain a stable posture.
Are TTL loupes suitable for implantology?
TTL loupes may be suitable when the working distance and clinical posture are well defined. They offer a personalised configuration integrated into the lens. Even so, it is important to check measurements, declination angle, field and depth before deciding, especially if working at different depths.
When is it advisable to add headlight illumination to the loupes?
Headlight illumination is useful when working in deep areas, with limited access or with shadows generated by hands and instruments. It should be assessed together with the loupes, because weight, frame balance and light direction affect the comfort of the set.
How is the working distance measured for implantology?
Working distance should be measured in the professional's real posture, seated or standing according to their usual practice. The measurement should reflect the natural separation between the eyes and the surgical field, without forcing a position that cannot be maintained during the procedure.
What data should be provided before a demo?
Before a demo, it is advisable to indicate priority procedures, working posture, approximate distance, previous experience with loupes, need for illumination and frame preferences. This information helps guide the configuration and compare options using technical and ergonomic criteria.
Next step for an adjusted choice
Choosing surgical loupes for implantology requires assessing optics and ergonomics as a whole. Magnification, field, depth, working distance and illumination should be tested under conditions close to clinical practice.
To review available options and prepare an adapted configuration, the professional can consult the range of Loupes loupes and accessories or speak to a technician before the demo.